TRAVERSE Global v11.1
Chart of Accounts
Use the Chart of Accounts function to set up and maintain the chart of accounts.
Make sure that the General Ledger tables and records in the other applications match the appropriate accounts in the chart of accounts. If they do not match, you cannot properly post the entries from those applications.
Note: When you finish setting up accounts, do not use this function to change actual balances. Changing actual balances with this function can put the ledger out of balance without leaving an audit trail. Instead, enter and post journal transactions to make the necessary changes. Likewise, do not use this function to change last-year balances; they are updated by the Clear and Close Last Year and Update Current Year functions.

- Click the New button, on the toolbar, to open a blank chart of accounts record.
- Enter a new account ID in the Account ID field.
Note: To copy account information from a similar record for a new chart of accounts record, select the existing account from the Copy From field. The Copy From field only appears when you are entering a new account. - Enter a description of the new account ID in the Description field.
- Select the status of the account from the Status field: Active, Inactive, or Discontinued. This status appears in all account combo boxes throughout TRAVERSE and controls whether transactions entered for the account post to the GL Journal, active accounts post to the GL Journal, inactive and discontinued accounts do not.
The inactive and discontinued statuses prevent entries to accounts that are no longer used while preserving historical and audit trail information. If an account will never be used again, assign it a status of Discontinued.
The system treats inactive and discontinued accounts as invalid accounts during processing. If transaction amounts exist for inactive or discontinued accounts when you post, the system does not post those amounts to the GL Journal and alerts you with an error message that invalid accounts exist.
Print the Invalid GL Accounts List (available in the System Manager, System Audits menu and the Invalid GL Accounts List function) to identify invalid, inactive, or discontinued accounts if you encounter problems when posting. Within GL, print the Chart of Accounts List to identify inactive or discontinued accounts.
Note: The status entered controls whether transactions entered for the account post to the GL Journal. Only active accounts post to the GL Journal.
- if you use multicurrency, select the currency to assign to the account from the Currency ID field.
Note: When an account uses a currency other than the base currency, TRAVERSE automatically converts transaction amounts entered into that account using the exchange rate you specify. - Select the segment ID for the different segments from the Segment ID field.
- Select an account type from the Account Type field.
- For a revenue or expense account, select the account to which to clear the new account, if applicable, from the Clear To Account field. If you do not want to clear the account at the end of the year, make sure that you leave the Clear To Account field blank.
- If you select an account in the Clear To Account field, you also need to enter a step to clear the account in the adjacent Step field. The account you select must match currencies with the Account selected in step 2.
- If you want to consolidate the account with an account in a different company, enter that account number in the Consol To Account box. If you do not want to consolidate the account, leave this field blank. The system uses this information in the Consolidate Chart of Accounts function.
Consolidating an account does not affect the balance of the account.
- If you select an account in the Consol To Account field, you also need to enter a step to consolidate the account in the adjacent Step field. The account you select must match currencies with the Account selected in step 2. If you enter 0, the account will not be consolidated. To consolidate all accounts in one step, enter 1.
- Click the Save button, on the toolbar, to save the new record.
- Select an account ID to edit from the Account ID field.
- Edit the fields as necessary.
Note: You cannot edit the currency of an existing account. - Click the Save button, on the toolbar, to save any changes made to the account.
If you accidentally save an account with incorrect information, select the account ID and then edit the record. Do not change actual or last-year balances.
If you enter an incorrect account number, reenter the account under the correct number. Then delete the old account.
- Select an account ID to delete from the Account ID field.
- Click the Delete button, on the toolbar, to delete the selected account ID. An account can not be deleted if journal or journal history records exist, or if the account has a balance.
- Click Yes at the "Are you sure you want to delete selected record(s)?" prompt.
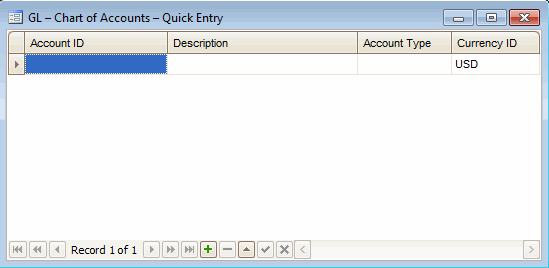
- Click Quick Entry.

- Enter the account ID in the Account ID field.
- Enter the description as it should appear in reports and on statements in the Description field.
- Select the account type from the Account Type field.
- Select the currency to assign to the account, if you use multicurrency, from the Currency ID field.
- Close the screen to return to the Chart of Accounts screen.
Use the Chart of Accounts List function to view the chart of accounts you have set up.
